AI Assisted Development
Learn how to start building projects with AI assistance in Blutui
Introduction
The rise of AI coding assistants such as Claude Code, OpenCode, Cursor, and GitHub Copilot has transformed the modern development workflow. These tools are incredibly effective at building components, complex forms, and even entire pages, However, their performance is directly tied to their understanding of your project. To get the most out of AI on the Blutui platform, these assistants must be guided to understand not only your specific codebase but also the unique syntax and features that power the Blutui ecosystem.
Why Blutui for AI Development
Blutui Context bridges the gap between AI coding agents and your Blutui application. It is made up of two parts that work together:
- A dedicated Model Context Protocol (MCP) server that gives AI agents deep, real-time insight into your project's architecture. Equipped with 36 specialized tools, it enables your assistant to build pages, create collections, generate forms and much more with precision.
- A set of Skills that teach your assistant the unique syntax, conventions, and best practices of the Blutui platform.
Blutui Context
Installation & Setup
To begin using Blutui Context, you must first ensure your local environment is running the latest version of Courier.
Running courier create can install Blutui Context for you automatically. The steps below cover installing it into an
existing project.
Upgrade Courier
Blutui Context requires the newest features bundled with the latest Courier release. Depending on your operating system, use the following commands to upgrade:
brew upgrade --cask courierFor more detailed instructions on platform-specific requirements, visit the Courier Getting Started Guide.
Configure the MCP Server
Once Courier is updated, you can automatically register the Blutui MCP server with your preferred AI environment.
courier mcp initYou will be prompted to select your environment:
? Which MCP client are you using?

(•) Claude Code
( ) Cursor
( ) Visual Studio Code
( ) Codex
( ) OpenCode
Once selected, Courier will apply the appropriate configuration path and register the Blutui MCP server for you. Now you can start your MCP server.
If your preferred environment is not available in the list above, you can manually configure your MCP settings. Please feel free to open an issue and we will work to add support.
Manual Configuration
Claude Code
If you're using Claude Code, you can add the Blutui MCP server directly from your terminal:
claude mcp add --transport stdio blutui courier mcp serverCursor, VS Code, etc.
For editors like Cursor or VS Code, create or open your mcp.json file and include the following configuration:
{
  "servers": {
    "Blutui": {
      "type": "stdio",
      "command": "courier",
      "args": ["mcp", "server"]
    }
  }
}
After saving the configuration, start your MCP server.
Depending on your preferred editor, the mcp.json configuration file is typically located within a hidden directory
in your project root, such as .vscode/, .cursor/, or similar, depending on the tool you are using.
Install the Blutui Skills
The MCP server gives your assistant tools to act on your project; the Skills teach it how to use Blutui correctly. Install them with the skills CLI:
npx skills add https://github.com/blutui/contextIf your AI environment supports it, you can target a specific agent by appending the --agent flag, for example:
npx skills add https://github.com/blutui/context --agent claude-codeThe skills CLI requires Node.js to be installed so that npx is available on your PATH.
Verify Connection
Once configured, verify that the Blutui MCP server is connected and running correctly.
Claude Code
Run the following command to check your MCP server status:
claude /mcpCursor, VS Code, etc.
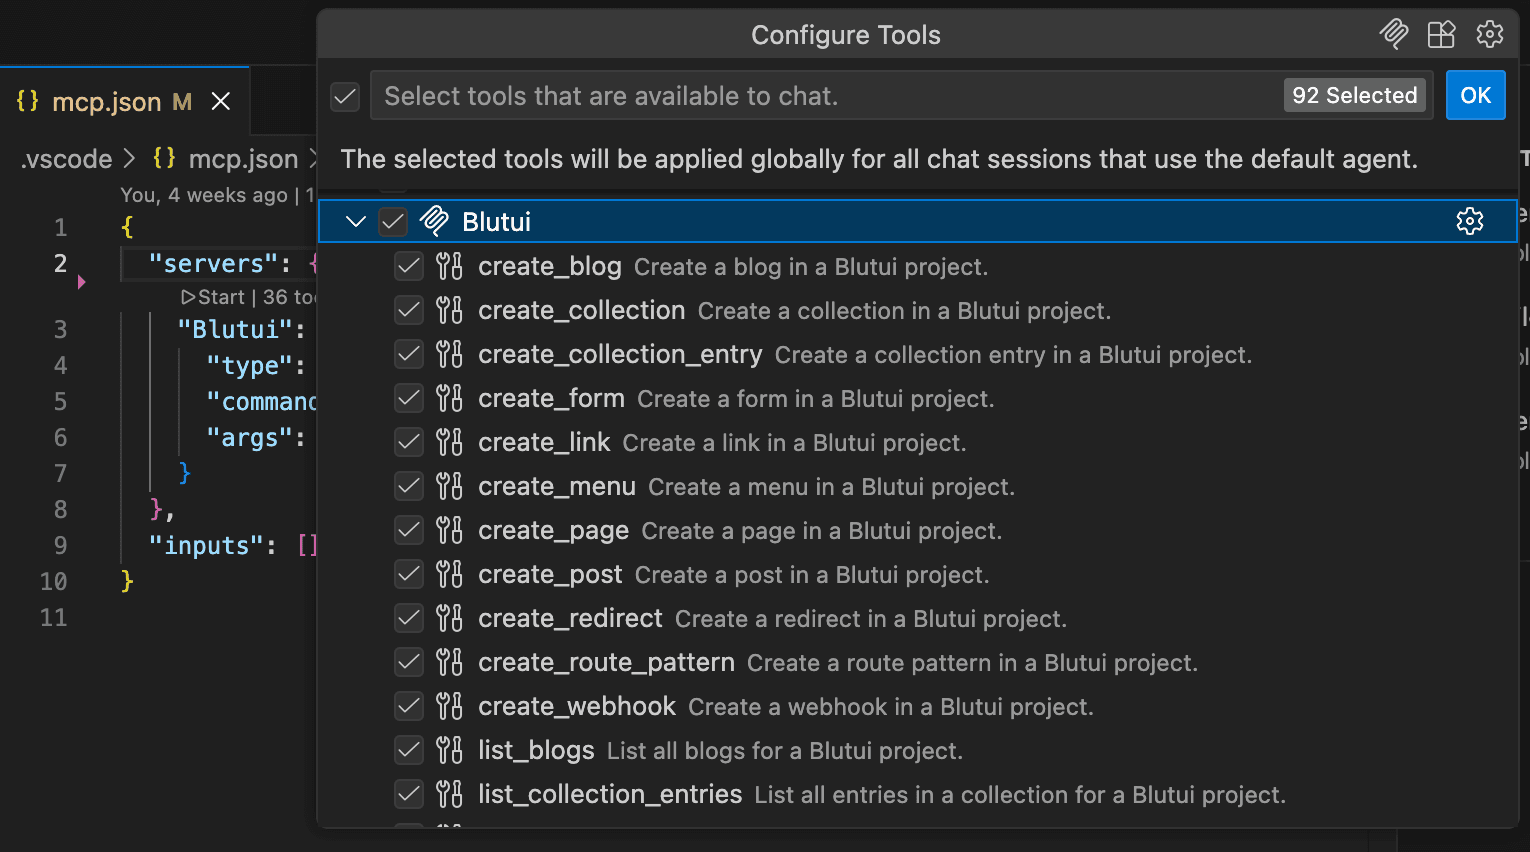 Your assistant will now have access to the tools designed to help you build and manage your Blutui application directly from your chat interface.
Conclusion
Now that Blutui Context is configured, you can connect the Blutui MCP server with servers from other providers to build faster. The real power of MCP lies in combining tools, for instance, connecting a Figma MCP server with the Blutui MCP server allows you to build a live site directly from a design file.
Last updated on